Mastering Tasklist: How to Make the Most of GitHub's Built-in Task Management System!
GitHub-2

In my college years, I led numerous teams and we participated in hackathons, project development competitions, and ideathons. The most difficult challenge was to monitor each member's workflow and suggest changes while they are working on something.
GitHub has a really great tool that allows you to manage your team member's workflow by dividing them up into separate columns or checkboxes, so that problem is now fixed. This feature offers a variety of benefits. This feature is known as Project boards.
Project Boards are a way to organize a checklist in a project by tracking the workflow of that undertaking, by simply creating a task list/ To-do list.
Now, What is the task list exactly?
You can use task lists to break the issues or pull requests into smaller tasks, and the entire set of work can be tracked until it is finished. A task list is a collection of tasks that each renders on a separate line with a clickable checkbox. You can select or deselect the checkboxes to mark the tasks as complete or incomplete.
The task list feature is part of Project Boards.
When you want to create project tasks that you want to do, there are some simple steps that we follow:
Any comment on GitHub can have a task list created using Markdown. A task list reference that refers to an issue, pull request, or discussion will expand to display the title and state.
There are a few easy steps we take when creating project tasks that we want to complete:
Step 1: Open the repository, then select Projects.
Activate the repository where you wish to keep track of issues or tasks. You should click the Projects icon once you have the repository open.
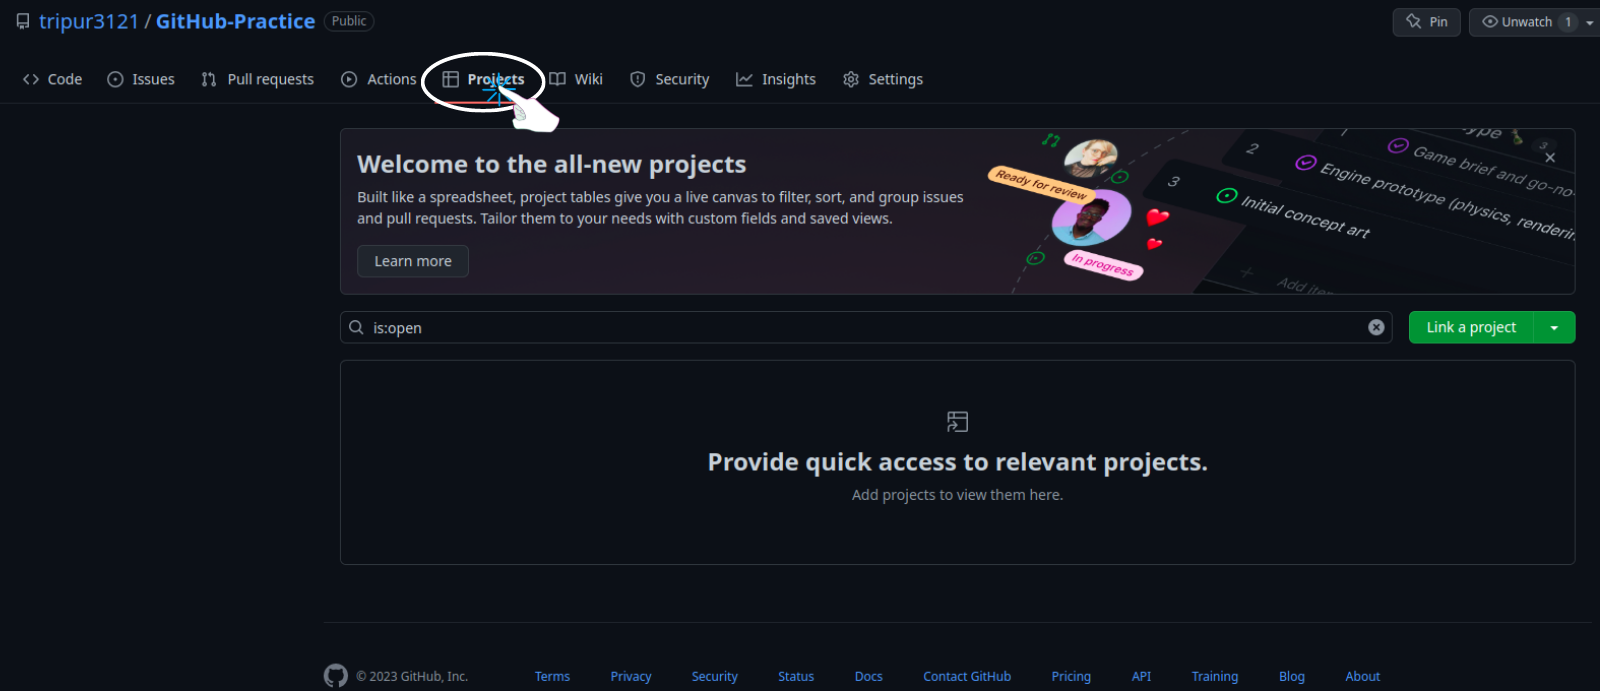
You can click the Learn More button to discover all the features of the projects.
Step 2: Make a new project.
To create a new project, click on the button link a project drop-down where you get two options.
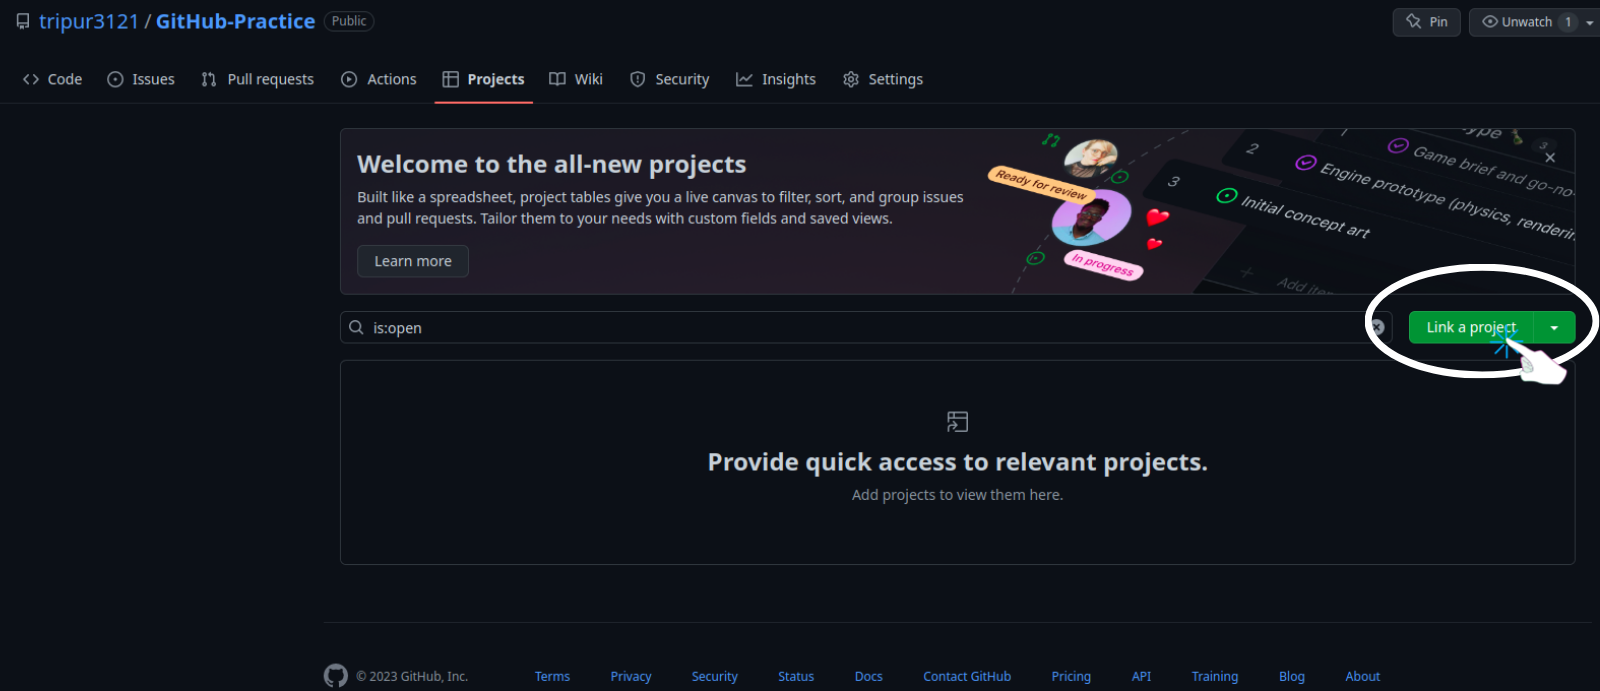
It will give you two options for adding a project:
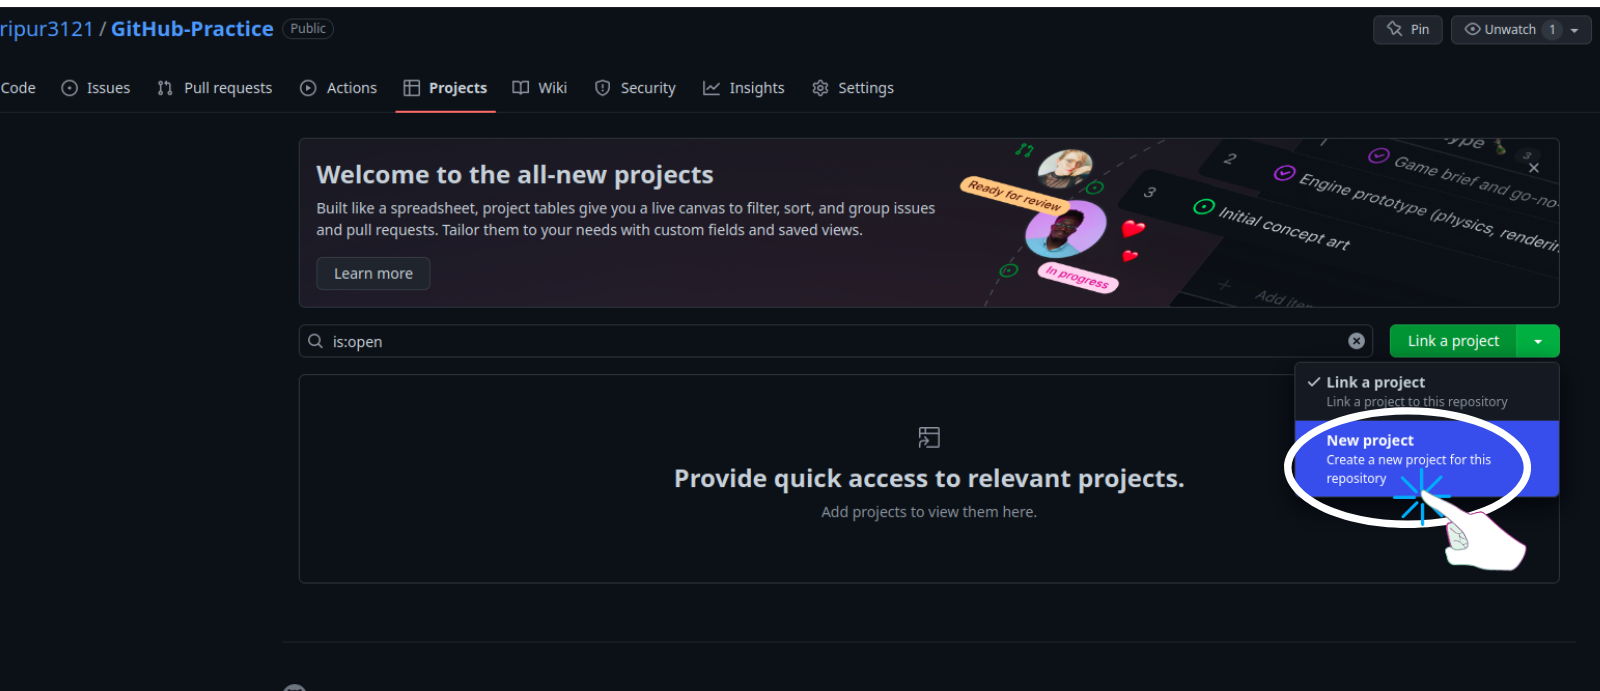
Link a project: Link this repository with an existing project.New Project: In the repository, start a new project.
We will start a new project by selecting the New project button since we have no previous projects to link.
Then the following will appear:
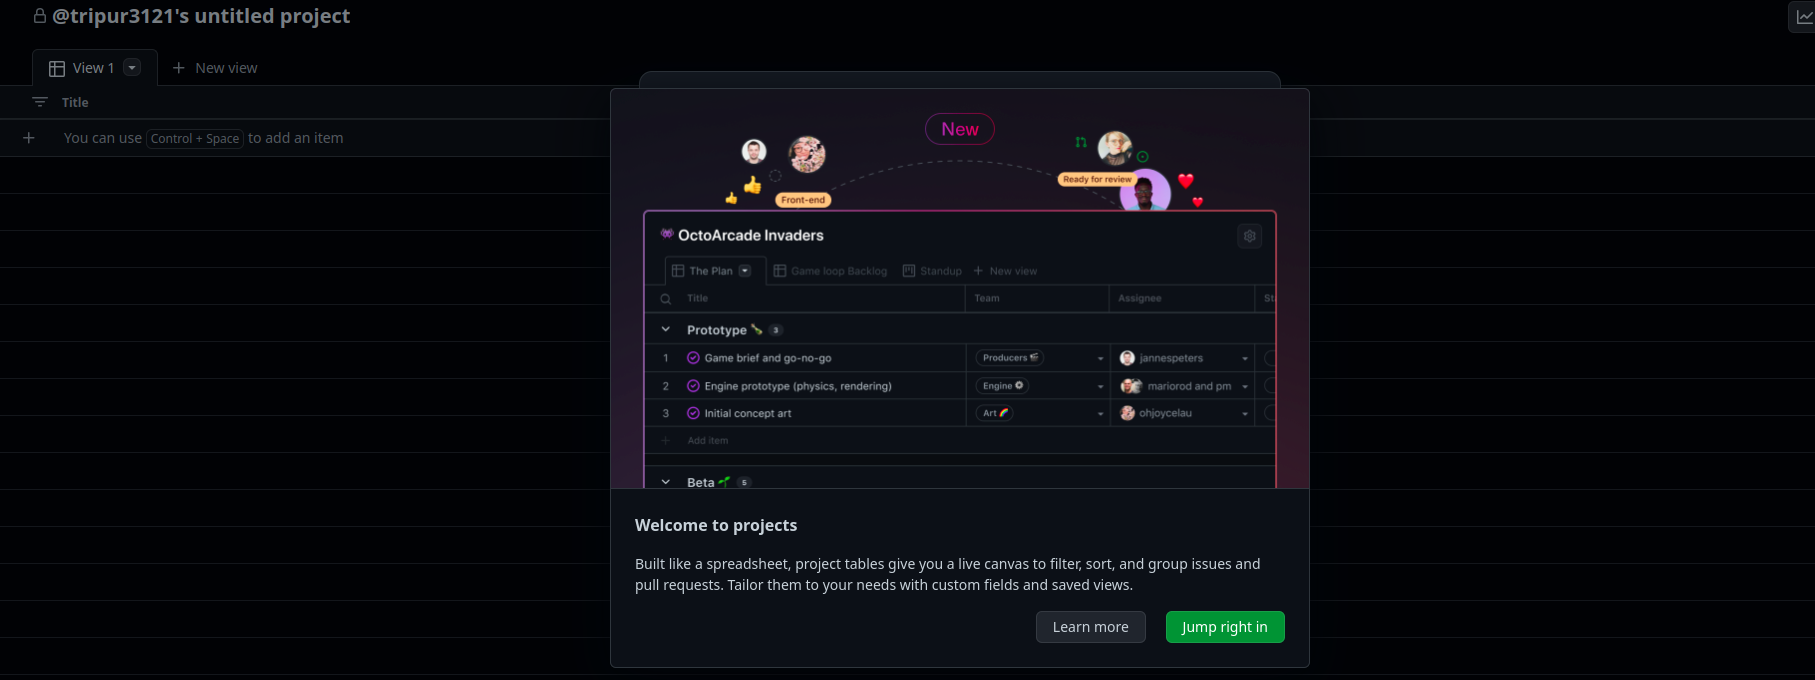
As you click on the button Jump right in, you will see multiple options to choose from.
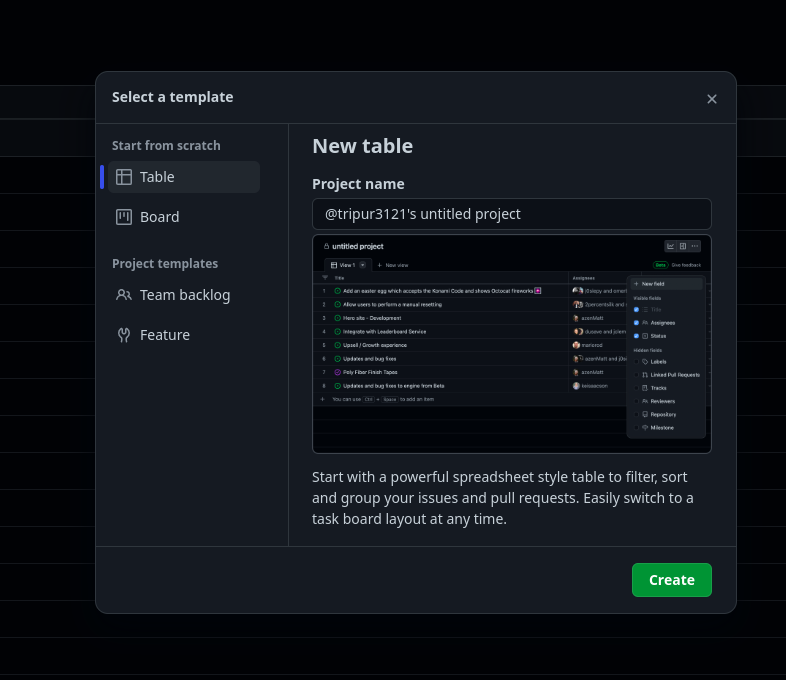
As you can see, there are several options available for you to select from and design your board to meet your needs. I'll explain each feature you can notice in the image above.
Project name: Here, you can type any name according to your preference. It will represent the name of your project.Select a template: It displays very clearly that you may create your template design or use the provided one, such as 'Team blocking' and 'Feature'.Start from scratch:There are two choices for this:
-> Table: It appears to be a list of checkboxes, similar to the illustration shown below. Like a spreadsheet table where you can group your issues and pull requests.
-> Board: To track your project, it will have various columns. The board, in my opinion, makes it easier to monitor the workflow and is more visually appealing.
You can switch between them at any time and very easy if you're unsure which one to select.
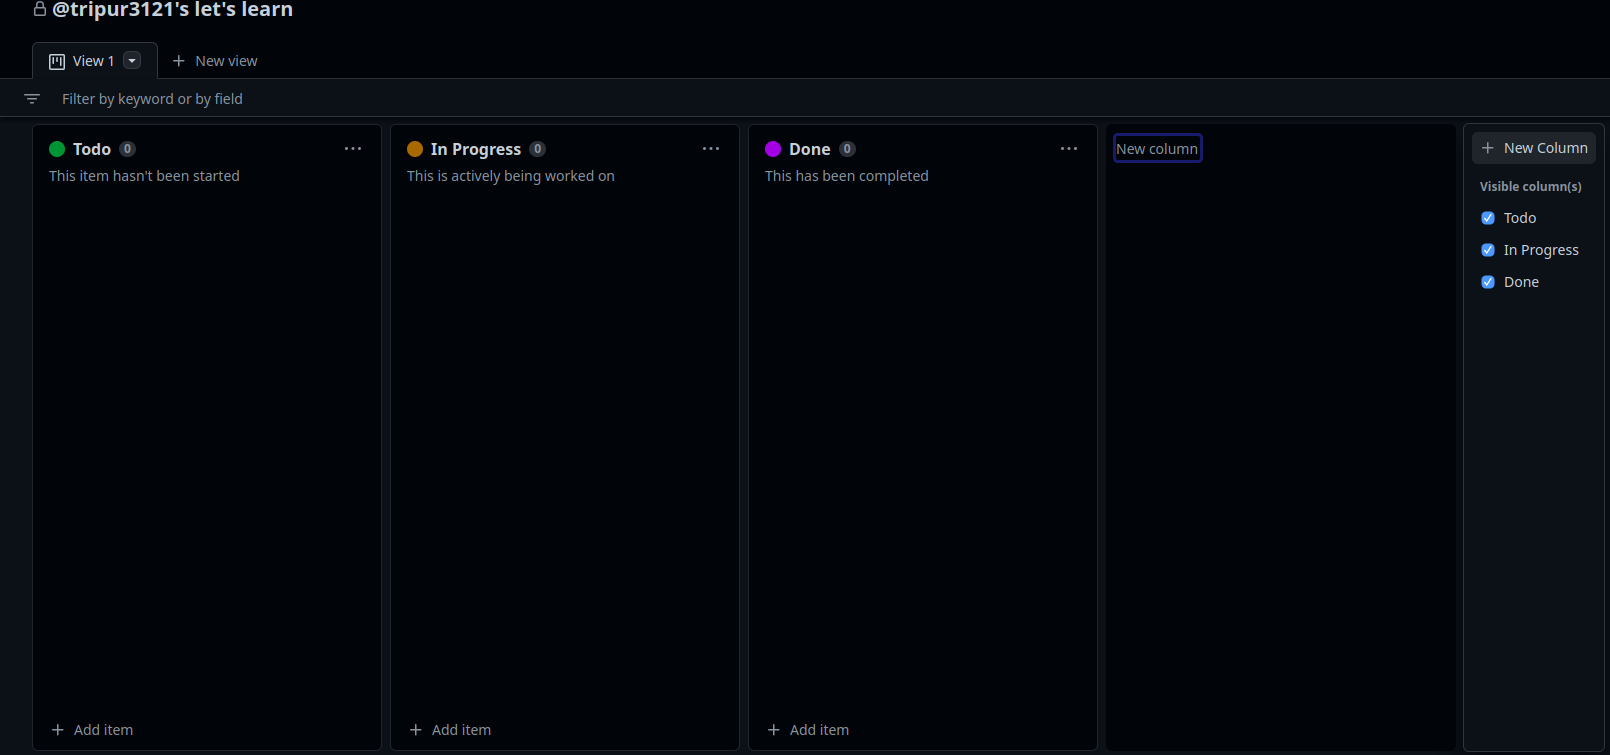
I'm going to select the board and alter the name of my project to " @ tripur3121's let's learn" at this point. You are free to use the table with a name of your choice. After that, a screen similar to the one below will appear.

If you wish to add a new column, you can do so here. We can now start posting our issues and to-do list. Click on Add item to add items to the list.
As an example, I have added a few items to the different columns.
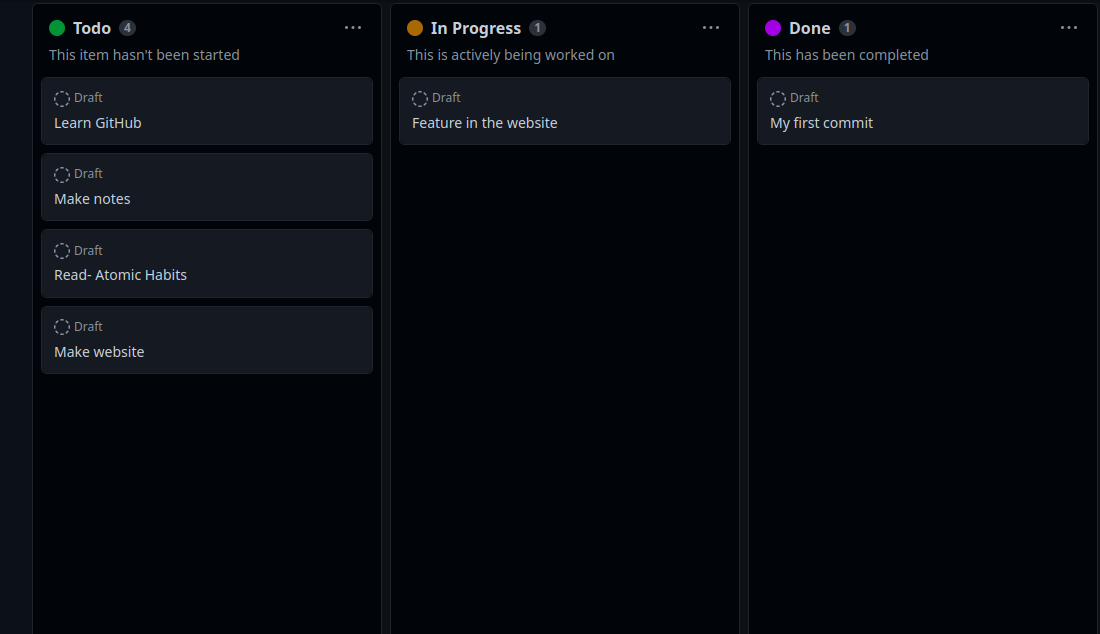
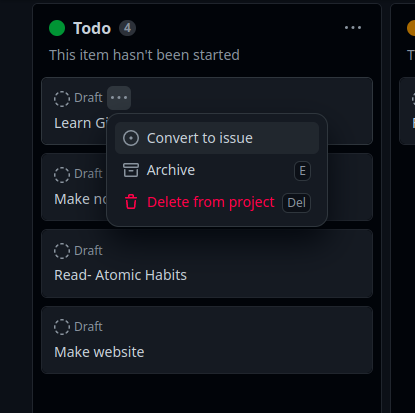
Hovering over the terms in the list, such as "Learn GitHub," will provide choices to remove, archive, or turn the item into an issue. Choose Convert to issue from the menu.
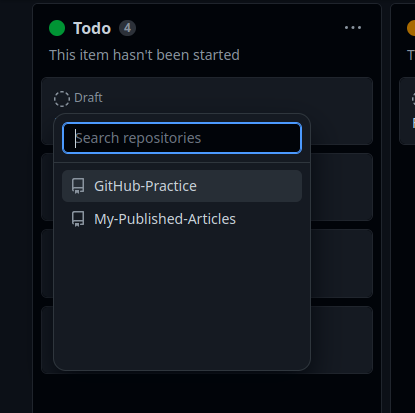
When I click on it, it will ask which repository I wish to use, and I will select GitHub-Practice.
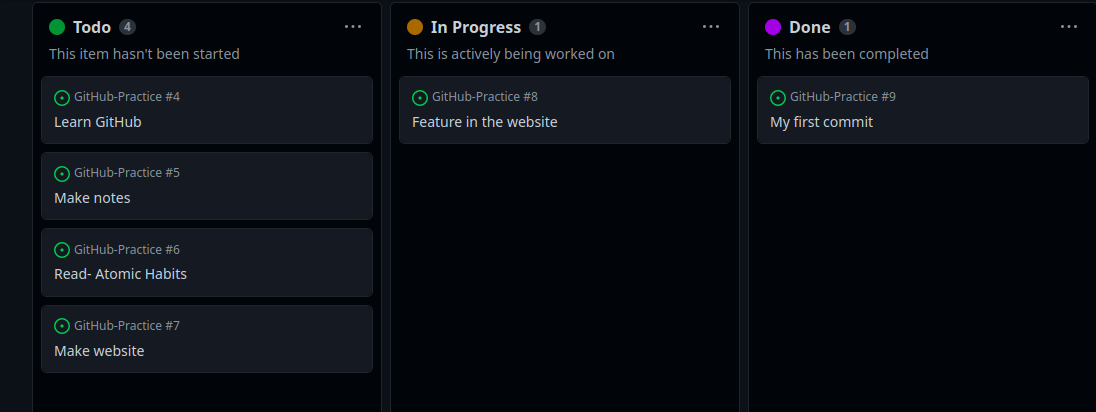
It will appear as follows once all the things have been altered into issues.
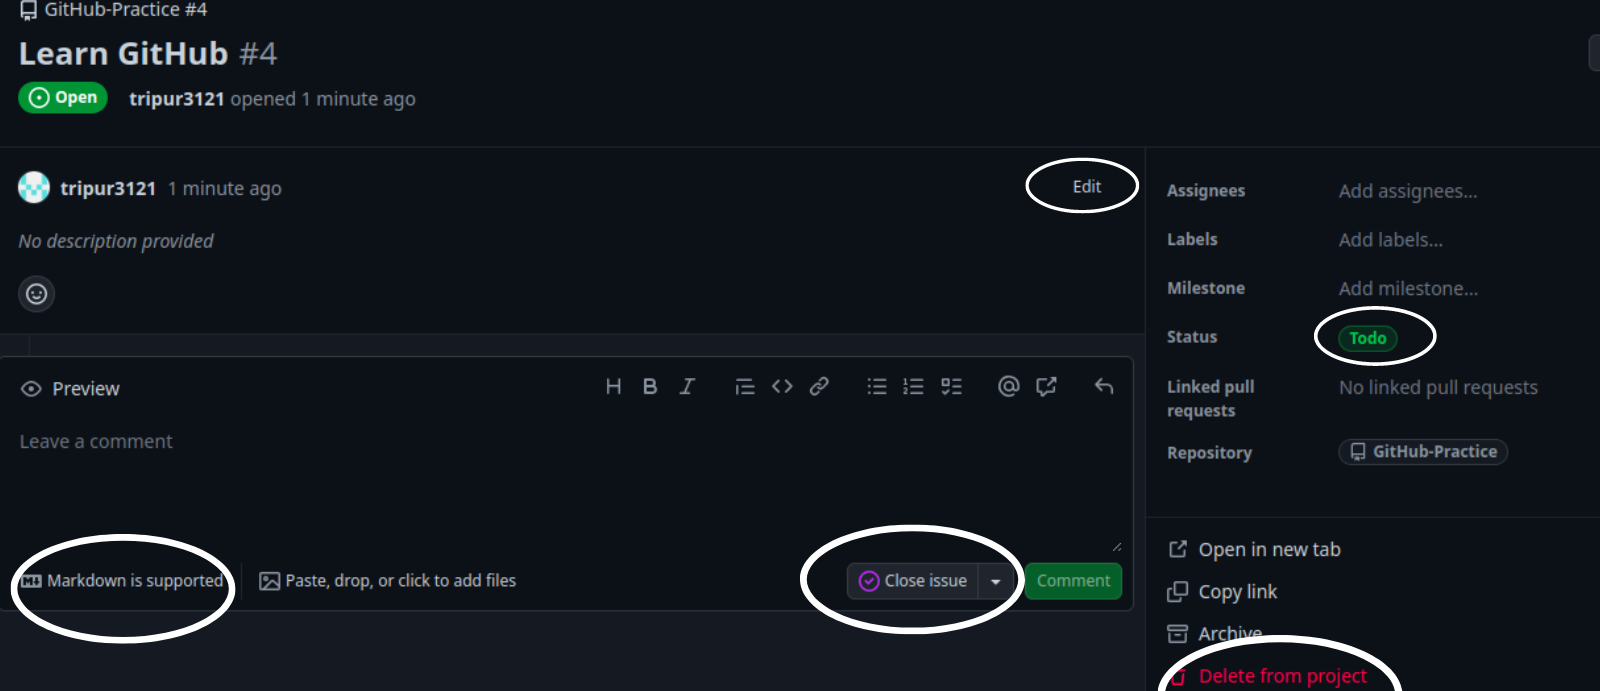
As you hover over and select Learn GitHub. Your browser will launch a page with a variety of tools that can assist you with a team project, such as:
Posting a comment.
The addition of a project description.
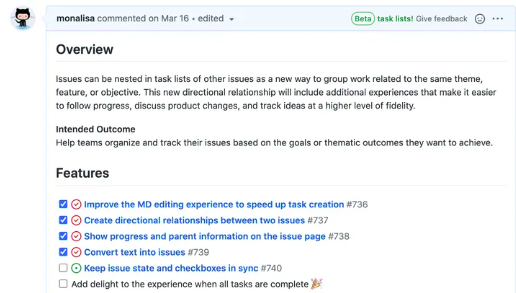
You can write stuff in Markdown:
As you are aware, you may use tags to generate a tasklist in GFM (GitHub-flavoured markdown).
  - [ ] for unchecked task
  - [x] for a checked task
The item may be removed from the project.
The item's status can also be changed to done or in progress.
That's it for GitHub tasks. Hope it helps in your team projects. Alright!


